
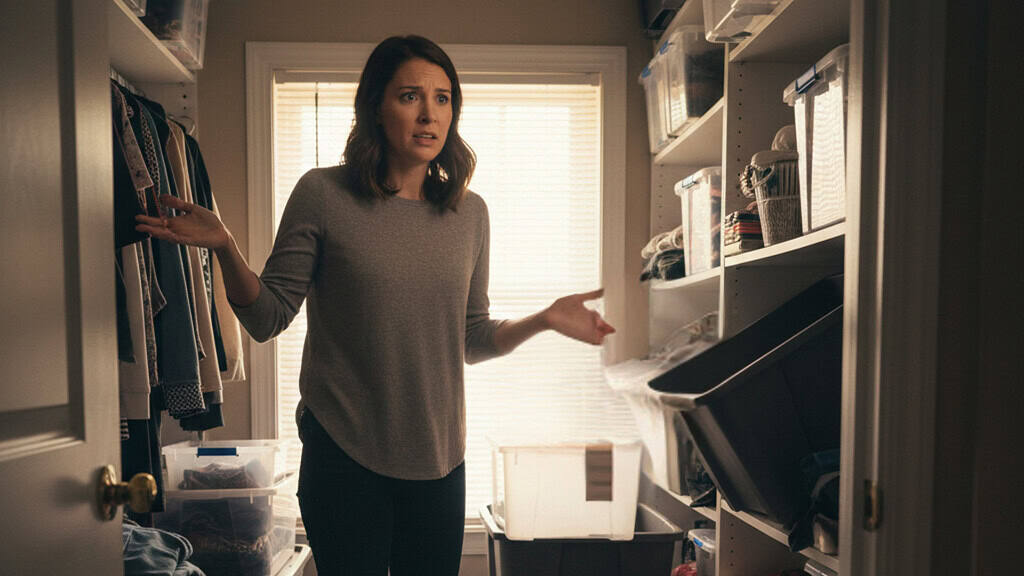
I used to think storage bins were the answer to everything.
My closet was a mess? Bins. The garage was out of control? More bins. The pantry looked chaotic every time I opened the door? Bigger bins.
And for a little while, it actually felt like progress. Everything had a container. Things looked neat. (at least on the surface)
But a few weeks later, I'd be digging through every single bin just to find the one thing I needed. Half of them had turned into mystery totes where random stuff went to disappear.
The other half were so full they wouldn't close properly.
I wasn't organizing. I was just relocating the clutter.
It took me longer than I'd like to admit to figure out that bins aren't the system. They're just part of it.
The way you use them (how you sort, label, and assign them a spot) is what actually determines whether your space stays organized or goes right back to chaos.
In this post, I'm sharing 5 things I kept getting wrong about storage bins organization, and what I do differently now.
These aren't complicated fixes. But they made a real difference in how my home looks and how easy it is to keep it that way.
5 Storage Bins Organization Mistakes I've Learned to Fix
None of these mistakes are obvious when you're making them.
Most of them actually feel like the right move at the time. But once I understood where I was going wrong, the fixes were pretty simple. Here's what I changed.
1. Buying Bins Before Thinking About What Goes In Them
This is probably the most common mistake I see — and I made it for years.
I'd walk into the store, find a set of bins that looked nice, buy them in three sizes because that seemed practical, and bring them home. Then I'd stand in front of my closet trying to figure out what to put in each one.
It never worked. The sizes were always slightly off. The large one was too big for the shelf. The small ones weren't big enough to hold a full category. And I'd end up forcing things to fit instead of the other way around.
What I do instead is figure out my categories first, before I buy a single bin.
I ask myself, what am I actually storing here, and how much of it is there? A bin for craft supplies looks very different from a bin for backup toiletries. One needs to be deep and wide. The other might just need a small divided container.
Once I know my categories, I measure the shelf or space where the bins will live. Then I go shopping with those numbers in my hand.
It sounds like an extra step. But it's the difference between bins that actually fit your life and bins that just take up space.
2. Skipping Labels Because “I'll Remember What's In There”
I told myself this every single time.
I'd fill a bin, tuck it onto a shelf, and think — I know exactly what's in there. I don't need a label.
Three months later, I had no idea. And instead of pulling out the right bin, I was opening four of them just to find the extension cords.
The problem isn't memory. It's that once something is out of sight, it's out of mind. And when you live with other people, “I'll remember” only works for you. not for anyone else in the house.
What I do now is label everything. No exceptions.
But I learned the hard way that not all labels last. Handwritten masking tape falls off in the garage when temperatures change. Sticker labels peel in the bathroom from the humidity. So I stopped using those for anything that needs to hold up long-term.
For bins that live in the garage, basement, or attic, I use label holders with printed inserts. They're more durable and easy to swap out if the contents change.
For closet or even pantry bins, simple printed labels on a label maker work well and look clean.
And I use a formula that keeps things consistent — category first, then subcategory. So instead of just “Holiday,” it says “Holiday: Lights” or “Holiday: Ornaments.”
That way I'm grabbing the right bin on the first try instead of pulling down three totes to find what I need.
3. Letting Bins Fill Up With No Limit
This one crept up on me slowly.
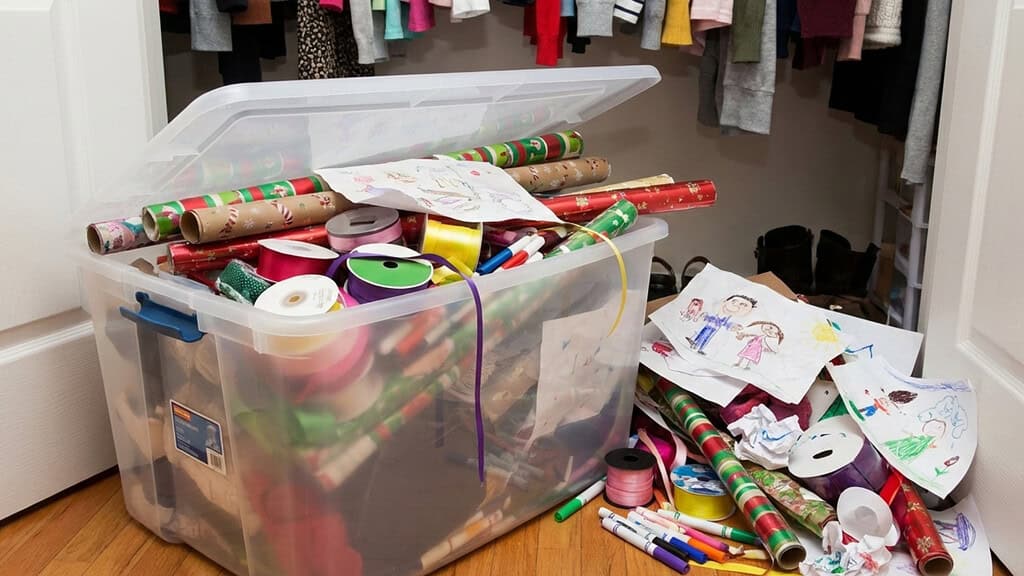
I'd set up a bin for something (gift wrap, craft supplies, the kids' art stuff) and it would look great for the first few weeks. Then little by little, more things would get added. A few extra rolls of ribbon here. Another set of markers there.
Until one day the bin wouldn't close and there was a pile forming next to it.
The bin didn't fail. I just never gave it a limit.
What I use now is something called the container concept. The idea is simple.
The bin is the limit.
Whatever category goes in that bin can only keep what fits inside it. When something new comes in, something old has to go.
Here's how I actually put it into practice.
First, I pick a bin size that fits the shelf or space I'm working with. (not the biggest one I can find, but the one that's right for that spot) Then I fill it with the things I use most or like best.
Whatever doesn't fit gets donated or tossed.
After that, maintaining it is straightforward. If a new set of craft supplies comes in, I look at what's already in the bin and pull something out. The bin stays the same size. The category stays manageable.
It works really well for things like hobby supplies, gift wrap, backup toiletries, kids' keepsakes, and seasonal decorating extras. Basically anything that has a tendency to quietly multiply over time.
4. Storing Things Without Giving Bins a Permanent Home
This was a big one for me.
I had bins. I had labels. But I never decided where each bin actually belonged. So they'd migrate. The bin that started in the hall closet would end up in the bedroom. The garage bins would get shuffled around every time we needed more floor space.
And after a while, nothing was where I expected it to be.
Finding anything meant walking through the whole house.
What I do now is create storage zones before I put a single bin away.
A zone is just a dedicated area for a specific category of stuff. The garage has a seasonal décor zone, a tools zone, and a sports gear zone. The basement has a zone for long-term keeps and one for holiday bins. The hall closet has a zone for cleaning supplies and one for extra toiletries.
Every bin has a category. Every category has a zone. And every zone has a fixed spot it doesn't move from.
The difference this makes is that I never have to think about where something goes. It just goes back to its zone. And when I need something, I know exactly where to look without opening every door in the house.
And what I always do to make zones work better is I already make sure to declutter before I assign a zone, because there's no point giving permanent shelf space to things that shouldn't be there.
I also use vertical space wherever I can.
Shelves and overhead storage keep bins accessible without taking up floor space you actually need.
5. Ignoring Color-Coding Because It Seemed Like Too Much Effort
I'll be honest.
When I first heard about color-coding bins, I thought it was overkill. (Something people did for Pinterest photos, not real life)
So I skipped it for a long time. All my bins were the same color. Same style. Looked neat enough from a distance. But in practice, especially in shared spaces, it meant everyone had to read every label before grabbing anything.
My grandkids would stand in front of the toy bins completely lost. My husband would open the wrong bin in the garage every single time. And I'd find things put back in the wrong spot constantly.
The labels were there. People just weren't reading them.
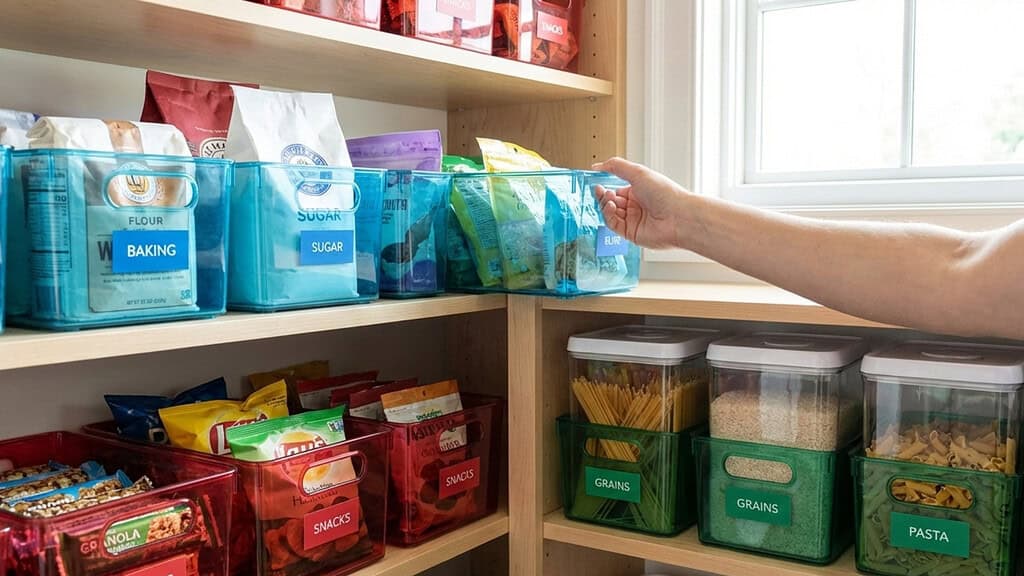
What I do now is pair color with labels in any space that gets used by more than one person. Each category (or each person) gets a color. It becomes a visual cue that works faster than reading.
In the pantry, I use color to separate categories. Snacks in one color, baking supplies in another, grains in another. Opening the pantry door, I can see at a glance if something is in the wrong spot.
It doesn't have to be an elaborate system. Even just two or three colors makes a real difference in spaces where multiple people need to find and return things on their own.
The Best Storage Bins Organization System Is One You Can Actually Maintain
Bins are not the problem. They never were.
The problem is putting them to work without a real plan behind them. No categories, no labels, no limits, no zones. Just containers holding whatever didn't have another place to go.
Once I started treating bins as part of a system rather than a solution on their own, everything changed.
I could find things on the first try. And so could everyone else in the house.
If you're looking at your space right now and feeling like it's a lot to tackle, don't try to fix everything at once. Pick one area (the pantry, the toy bins, the linen closet) and apply just one idea from this post today. That's enough to start.
Clear bins where you need to see things. Labels that actually stick. A size limit so bins don't overflow. A permanent spot for every category. And a color cue for anyone else sharing the space.
You don't need all five at once. You just need to start somewhere.
Want a Clear Starting Point?

My Free Declutter for Self Care Checklist gives you a step-by-step plan to work through your space without burning out halfway through.
It's straightforward, easy to follow, and designed to help you actually finish what you start.
Frequently Asked Questions
Are clear bins better than opaque bins?
It depends on what you're storing and where. Clear bins work best in spaces where you need to find things quickly — the pantry, craft storage, toy bins, or anywhere you're opening and closing containers regularly. Opaque or wicker bins are a better fit for things that aren't pretty to look at or spaces where you want a calmer, less busy feel. A mix of both usually works better than going all one way.
What should I store in clear bins?
Clear bins work really well for pantry staples, craft supplies, toys, and backstock items like extra toiletries or cleaning supplies. Basically anything where being able to see the contents at a glance saves you time and stops you from buying duplicates of things you already have.
What's the best way to label storage bins so labels don't fall off?
For bins in the garage, basement, or attic, label holders with printed inserts hold up much better than stickers or handwritten tape — especially where temperatures change. For pantry and closet bins, a label maker gives you clean, consistent labels that last. Whatever method you use, a simple formula helps: category first, then subcategory. “Cleaning: Bathroom” is easier to scan than just “Cleaning.”
What is the container concept for organizing?
The container concept means the bin itself sets the limit for a category. You choose a bin that fits your space, fill it with what you use most, and whatever doesn't fit gets let go. When something new comes in, something old leaves. It keeps categories from quietly growing beyond what you actually need or use.
How do I organize storage bins in a garage or attic so I can find things fast?
Start by creating zones — a dedicated area for each category like seasonal décor, sports gear, or tools. Every bin goes back to its zone every time. Use clear, labeled bins so you can identify contents without pulling everything down. And use vertical space with shelves or overhead storage so bins stay accessible without taking up floor space.
Follow me elsewhere!